Because more and more resin 3D printers are being put on the market at affordable prices, it is interesting for more and more people to start using them. The threshold is lower, the results are generally fantastic and it's quite simple to get started. However, there are a number of points to consider when starting with resin 3D printing . Today we look at a number of points that you should not forget.
1. Ventilate the room well
Essential for the safe use of resin is the space in which it is done and the ventilation that is required. When processing resin, hazardous substances are released that can bite your eyes and cause an allergic reaction on your skin. To prevent the former, it is important that a door is always open, a fan is nearby and the air is actively being replaced. Do not forget this!
2. Always use gloves
It is sometimes underestimated, but especially with cheaper variants of 3D printer resin, so many chemicals are added in the process that it can be corrosive to the skin. It is therefore always advisable to wear nitrile gloves and to throw them away after each processing. Do not use gloves twice and do not save money on them. It is advisable to purchase powder-free gloves, so you can be sure that your 3D print will continue to look its best and will not stain. Discover all 3D printers and cutters at Filamentz .
3. Use the right tools
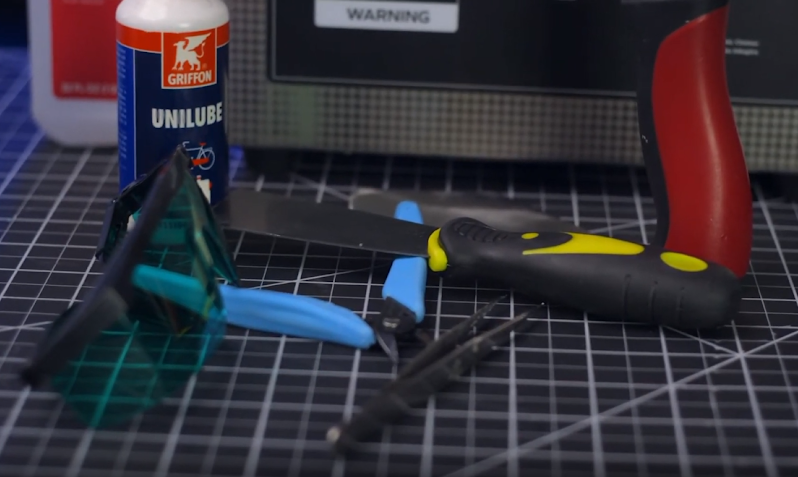
In addition to the gloves mentioned earlier, there are a number of essential tools that should not be forgotten with resin 3D printing. A comparison can largely be made with FDM printing:
- Sharp cutting pliers
- Stanley knife
- Nice gripping pliers
- Lubricant for the 3D printer
- A washing installation with isopropanol
- A curing installation with UV lamps
- Safety glasses for contact with resin

4. Avoid direct contact with resin
As previously read, it is essential to use resin gloves and wear safety glasses with a 3D printer. It should therefore not be underestimated that direct contact must be prevented at all times. It is easy to quickly pick up an unhardened piece of resin and throw it in the waste bin, but try to avoid this. It is common to use a number of sets of gloves per 3D printing session with resin, so do not be stingy with this.
5. Set up the workspace spaciously
To prevent resin from leaking, falling over or being impossible to clean, it is advisable to space out the workplace where the 3D resin printer is located. Consider a minimum length of 1.5 meters to set up the resin 3D printer and washing station. Any resin stock could be placed elsewhere , out of direct sunlight and in a cool place. Keep in mind that you should be able to easily change tanks and cartridges as well as remove supports with a little bit of wiggle room.

6. Wash the 3D resin prints in isopropanol
To remove any residues when printing with 3D printer resin, you must always wash the object. This can be done in water, but it is recommended to do this with isopropanol . Isopropanol is alcohol in its purest form. Resin will dissolve in the alcohol and leave a clean print when the 3D print hardens. However, do not let your print wash for too long, a maximum of about 10 minutes, otherwise you run the risk of losing details in your 3D print because it dissolves.
7. Remove support before curing
A tip to get the best results from your resin 3D printer is to remove the support before curing this 3D print in UV light. After the printing process has been completed, the resin will still feel somewhat flexible, so the print will not break easily, but the points of the support will quickly come loose, making it an ideal moment to loosen it all up. This also prevents certain areas from receiving UV light during curing, so they will remain somewhat flexible.
8. Build or purchase a UV lamp installation
Curing 3D printer resin is possible in sunlight. On an average sunny day there will be enough 405 Nm light to sufficiently harden your resin. This of course depends on the volume of your 3D print and whether all sides can be illuminated. One piece of advice is to even build a curing installation with UV lamps or to buy one. Making one yourself is an option by purchasing UV strips and placing them in a closed box with mirrors. Of course, there are also purchasing options. Formlabs has very nice units available for this , which can be expensive. This checks the UV light and also the temperature to ensure everything is fully cured upon completion.

9. Sand the 3D prints with the appropriate sandpaper
Most 3D printer fanatics use resin to 3D print highly detailed models and extensively paint and treat them. A first tip for the correct after-treatment is to select the right sandpaper. It is advisable to buy a relatively fine grit (300) and then use the variant that can get wet. This prevents your detailed 3D print from becoming soft again due to the friction caused by sanding. If you do this under certain circumstances, you will largely prevent this. After a layer of primer, the real painting can often begin, where we often prefer acrylic paint.

